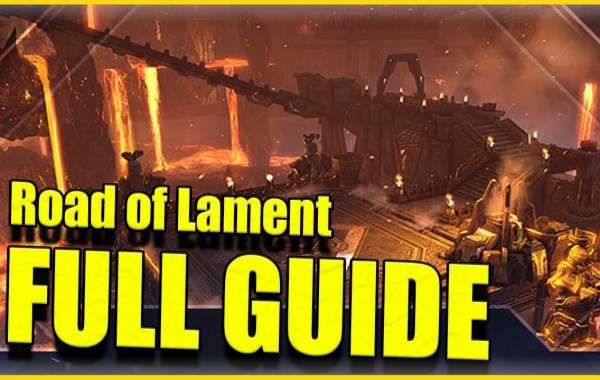
The Road of Lament is just one of these many dungeons, and in order to enter it, the minimum level requirement for level two content must first be met. It is the first of two Abyssal Dungeons that are located beneath the larger Ark of Arrogance dungeon, which you explore as part of the primary story questline of Yorn. The buy Lost Ark gold of Arrogance dungeon can be found in the southwestern region of Yorn.

The Road of Lament contains two bosses that must be vanquished; however, the catch is that both of them have one-shot attacks, which can completely wipe out your entire team if you are not careful. If you are, however, careful, you will be able to defeat these bosses.
Even though we will discuss a few other noteworthy mechanisms as well, our primary focus will be on their one-shot mechanics. This does not mean that we will ignore the other noteworthy mechanisms, however. The fundamental patterns of their attacks won't be discussed because they have such a negligible impact on the course of the fights.
How to Gain Entry to the Path That Leads to Misery
In order to enter the Abyssal Dungeon of the Road of Lament, you must first fulfill all three of the following requirements in their entirety:
It is required that your character be level 50 (which you should already be by the time you reach Yorn, so this shouldn't present much of a challenge for you).
Have completed all of the quests that are associated with Yorn's primary storyline, including the quest "Stop Velcruze."
You are required to have an item level of 840 or higher.
If you have an item level of 1,325 or higher, the rewards that you obtain from the Road of Lament will become progressively less valuable as you progress through the zone.
You will not be able to acquire any Lost Ark gold online or engravings, and despite the fact that you will still be able to obtain the materials from tier two, you will find that they are of very little use to your tier three character. At this point in the game, the only reason you are going through this dungeon is to collect the card packs (or to carry a friend), neither of which is an especially compelling reason.
The Road of Lament now features a Challenge Mode.
If you complete the Road of Lament in its Challenge Mode, which rotates with the other Abyssal Dungeons and can be accessed at any time, you will be rewarded with loot that is suitable for your current tier level.
First Boss: Nazan
To tell you the truth, the majority of defeating Nazan, the first boss of the Road of Lament Abyssal Dungeon, comes down to dodging his fundamental attack patterns (he favors line-attacks)
This is because Nazan's attacks tend to be linear in nature
The Road of Lament Abyssal Dungeon features Nazan as its initial boss encounter
There are a few of them, but none of them are particularly difficult to avoid or cause particularly high damage
However, there is a particular mechanic that you need to keep an eye out for because it has the potential to kill you in a single shot and eliminate the rest of your party
The Carousel's In-House Mechanic
Nazan places the utmost importance on the functioning of the carousel's mechanism. This will serve as the unmistakable indicator that the mechanic is getting ready to start its work. After that, he will perform the action that the name of the mechanic implies he will do, which is turn around.
Keep in mind that he can change directions at any time, so don't think you're safe just because you're outrunning it at first. Keep in mind that he can change directions at any time. He is able to make abrupt course corrections at any time. His blood magic, which has a coloration that is somewhere between red and black, will cover the remaining territory completely.
Outer Ring Safe Zone
The first possible variation can be viewed as an exact reflection of the second possible one. The small ring that is directly around Nazan has been turned into the danger zone rather than the safe zone because it is now in the immediate vicinity of the city.
Some of you will be marked by Nazan with a target above your heads, and after a brief pause, two circular areas of effect will appear beneath you, one after the other. This will continue until all of you have been affected.
Because they will stay put for the duration of the Carousel mechanic, it is in your best interest to try to drop them so that they are close to one another and the edge of the playing area. It will be much simpler for you and your party to travel through the area without putting yourselves in danger and to avoid Nazan's death beams as a result of this.
There are two bosses to fight in the Road of Lament Abyssal Dungeon. Kyzra is the name of the second and final boss. In a manner analogous to that of Nazan, her fundamental attack patterns are relatively simple, as the majority of the time, all that will be required of you is to simply avoid them. However, she, like Nazan, possesses a single one-shot mechanic that, unlike his, requires the cooperation of you and the other members of your party in order to be successfully completed.
Getting Ready to Do Battle Before Facing the Boss
Before beginning the boss fight, you and your party should have a good idea of where you should stand on the map. The boss fight requires that each of the four corners of the map be covered in order for it to be successful. This ought to be finished before even delving into the mechanics of the car themselves. Consider the fact that you are currently in second place among all of the members of the group. Due to the fact that two plus three equals six, you ought to focus your attention on the area that is represented by the six o'clock hour on the map.
It is necessary for you to run into three Lost Ark Argos Gear Set (read more) orbs in order to acquire a golden aura around yourself. This aura will be of assistance to you in the subsequent part of this mechanic, so make sure you do this step as soon as possible. There will be a widespread appearance of large red orbs, which will make their way toward Kyzra in a very deliberate manner. These spheres are a noticeably different size compared to the ones that were discussed in the previous section.
Due to the fact that Kyzra will destroy your entire party with a powerful red shockwave if even a single red orb reaches her at the conclusion of the mechanic, it is imperative that you work together as a group in order to avoid this fate. If at least two of you don't get the golden aura, this whole thing is going to be a waste of everyone's time.
Notable Non-Wipe Mechanics that Kyzra Utilizes
During this check of Kyzra's stagger, she will send out four shock waves into the surrounding environment. If you are unable to pass the stagger check before she releases the fourth shockwave, the party will not be completely annihilated, but they will take a significant amount of damage. If she is successful, she will conjure a small red aura around her that deals damage to your melee party members and makes it extremely difficult for them to deal damage to her. This aura will also deal damage to her if she is successful.